Metal Detecting Equipment
Pages 10–17
Congratulations! At this stage of reading my book you have now bought, or are thinking about buying, a metal detector. But what else do you need and what, more importantly, don’t you need? Like any hobby, it’s too easy to buy, or get sold, something you will never use. So let’s look at a basic list of things that are going to make your detecting day a lot better and your research afterwards more enjoyable.
Detector
I hope that this book is going to help you choose a detector that will give you a good start in our hobby. However, your first choice is so important that I have allocated a complete chapter to just picking a suitable machine. As this isn’t it, let’s move on to other equipment.
Small Pinpoint Probe
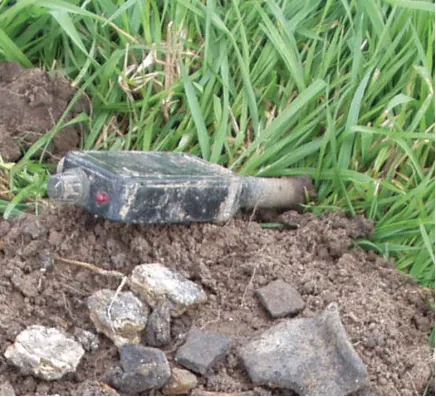
A small pinpoint probe is one of the most useful bits of equipment that you can carry. You can live without one, but in my view it is worth getting a slightly cheaper detector and coughing up the £60 to £80 needed to buy one. They are little detectors in their own right and their job is to check the inside of your hole, or your pile of dirt, for the target you are digging. They can save you lots of time and frustration, and locate objects that you would otherwise lose. I have heard many detectorists’ sad tales of ruined finds by them not realising that the item was just where they put in the spade for the second time. I would not be without mine, and it’s about 18 years old now. All the writing has worn off, and it’s held together by gaffer tape. I don’t even know what make it is, but it’s worth its weight in hammered silver to me. I carry it in a holster on my belt, with my knife, rubbish pouch, and a small first aid pack.
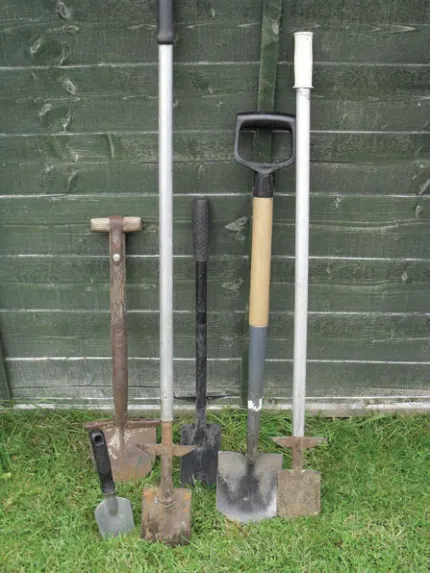
Digger
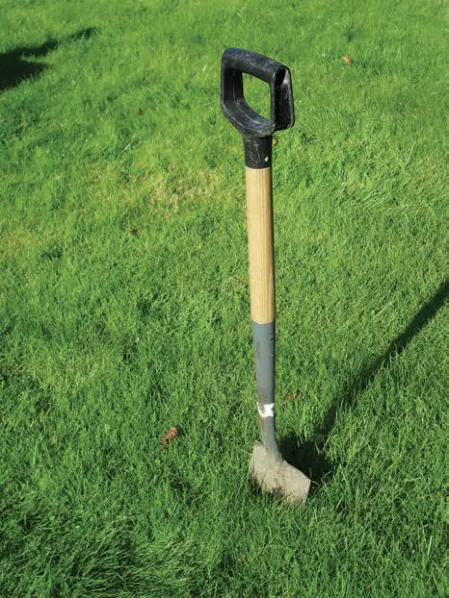
I once heard a story of a detectorist who gained permission to search a field but, on his first visit, was chased off by an irate lady shouting. “I didn’t know you were going to dig holes!” You really can’t do without one of these essential items and they come in many shapes and sizes, from small hand trowels to a garden spade that a navvy would be proud of. They are normally made of iron or stainless steel, either with the head welded to the shaft or made all in one. A garden trowel is far from ideal as you would have to spend a lot of time stooping down, and it may well lack the strength. A large garden spade is too big and too heavy to cart around for hours on end. What you need is something that you can dig a hole with at just the correct size that you want. So it stands to reason that you need a sharp implement that will do the job and will not leave you with a hole the size of a grave. There are many purpose-made diggers on the market. You will find these for sale in Treasure Hunting, and from the detector dealers. The stainless steel ones are always going to be dearer, but they are stronger and much less inclined to break, so should last for many years. The ideal size for the blade is about 4 inches across, and about 5-6 inches high, with a good long handle of about 24 inches. Some people lengthen the standard handle by adding a longer one and this will certainly help if you have a bad back. I use a small (and I mean small) 6 inches by 8 inches “lady’s spade”. As I am now in my declining years, I find it’s easier to carry and dig with this than some of the purpose made diggers. Whatever you use, you will find it easier to dig in grass if the blade is kept sharp and I keep mine this way by running a sharpening stone over it most weeks. A good suitable digger can make all the difference to whether you enjoy the hobby or find it hard
work. The standard garden trowel, as stated, is only really good for planting petunias.
Headphones
Headphones should always be used as they enable you to hear the faint signals, rather than just the loud and medium ones (should you detector have an integral speaker). Also, detecting without them is inconsiderate as internal speakers make a racket that disturbs other detectorists, the public, dogs, or just the tranquillity of the local countryside. The purchase of a good pair of headphones is a well worth the investment. There are many on the market, ranging from just a few pounds to well over £50. I think it’s always wise to buy the best that you can afford, without breaking the bank. A quality pair of headphones will have a good layer of padding on them and perhaps a separate headphones-to-detector lead. (In the past my lead always seemed to break at the detector end by the jackplug). Some manufactures (i.e. Minelab), provide a well-suited pair of headphones matched to a specific detector to obtain best results.
Belt Pouches
A pouch that has a few different compartments is very handy as you don’t want your good finds mixed up with the dross. A few small plastic bags are very useful for small good finds. Also on my belt I have a long blunt knife that is very practical for finding items when the probe says they are in the side of the hole. In a small pack on the back of the belt I carry a plastic rain poncho and a small first aid tin. Both of these items I have never had to use, but as the Scouts say: “Be prepared”.
Gloves
These are always a personal issue; I always wear them but I know of many detectorists who never do. The way I look at it, is to just
think of what has gone into the soil over the years: cows, sheep and horses have all done their thing, and in the Victorian age all the night soil from the towns was spread across it. The farmers have dosed the fields with every known chemical they can think of and a few more, just to make the crops grow, and that’s just the start. Then you have all the sharp bits of tin cans, barbed wire, and items that would look good on an alien spacecraft. Next you have all the items of rubbish, some of which can be very sharp, including discarded needles from the old time vets, which quite regularly turn up and then, my favourite, the screw bottle top which gives such a good signal, but also has an inch of broken glass still attached to it. Even a blade of maize can give you a nasty cut, which can get infected. A good pair of leather gloves will set you back a few pounds in a garden centre, but keep you warm in the winter and will last years; they are well worth it in my opinion.
Footwear
I always start out in a pair of boots and only put my Wellingtons on if it is really necessary. Some people wear normal shoes, even trainers, but a pair of boots comes in handy when walking or detecting across stubble fields. When out detecting you can encounter stone or muddy tracks, boggy fields, stubble, brambles and stinging nettles, or a rough ploughed field that can take on the feel of a Himalayan trek. I still remember the day when I wore a pair of steel toecap boots – never a good idea although I got plenty of signals! I had to spend one of the hottest days of the year wearing my Wellingtons while other people were in shorts and trainers. I provided a few laughs that day but, since then, I always double check before I leave. A pair of Wellingtons is a must if you want to keep your feet warm and dry. These are not a fantastic expense and, with a second pair of socks on, walking on wet winter fields does not have to be like walking on blocks of ice.
Maps
I find a small map of the fields I am detecting in very useful, as this not only shows you where you are, but also where you want to go. It also allows you to plot your find spots, as you might not remember where each item came from when you get home. A copy of a map can help the landowner mark where you can go on his land. He might also be able to point out fields which belong to
other farmers and that’s always very useful. A GPS system can be used to plot your find spots very accurately, but there is quite a price tag (although they are getting cheaper), which might not be cost effective for somebody just starting out in the hobby.
Extra Batteries
A pack of spare batteries in the car can save the day sometimes, because wherever you go it’s not going to have a shop in the corner of the field and, even if it did, they wouldn’t stock the ones you need. If it’s not you, then they might come in handy for somebody else. I remember saving the day for somebody at a rally (who will remain nameless) by giving him a brand new pack. At the end of a long day, he took them out of his detector and gave them back to me: it’s a funny old world! There are two basic types to use: disposable or rechargeable. Alkaline disposables are relatively cheap, but you have to keep buying more. Good lithium rechargeable batteries are dear to buy, and you have to include the price of the charger in the total; but you can recharge them at least 300 times, according to the pack. A good set of batteries normally last me for two full days’ detecting. You can buy the cheap and cheerful ones from your local supermarket, but a quality set seem to last a lot longer - and do you really want to be detecting when your machine is working only on half power?
Clothing
You are definitely, at some stage, going to need a windproof coat and a warm hat as it can get quite cold in the fields in late summer and even worse in winter. A good coat will keep out the cold and keep you dry if you are caught out in a rain shower. With a hat, which can be stuffed in a pocket or rucksack, you will keep your head warm, and that is a must in winter. A pair of headphones will keep your ears warm, but that’s about all. Both coat and hat can be utilised from normal clothing, and don’t have to be bought specifically. I keep a pair of waterproof over-trousers in my car, just in case it’s windy and cold on a winter’s day.
Kneepads
As you get older these might come in useful, I personally cannot get on with them, and just have a cut down kneeling pad on a bit of elastic string fixed to my belt. It works for me.

Small Rucksack
Personally I don’t bother with a rucksack but I know that my detecting partner Tony does. He crams it full of hats, anoraks, compasses, water, sandwiches and spare batteries. Each to their own, I suppose. Oh yes, and a small first aid kit which, I guess, is quite a good idea.
Chair & Lunch
A small folding chair carried in the car, will be a welcoming item for food breaks. As you get on in years, there is nothing more pleasing than a chair to sit on when you have your lunch (“What a sad comment on old age, Dave!” as Tony would say). A chair takes the weight off your legs for 10 minutes or so, and gives you a new burst of energy to start again. Always carry something to eat and drink, as you never know when you will need it. Even just some chocolate and a can of drink can make all the difference.
Grid Position System
The one piece of equipment that we have not talked about is a handheld GPS. Why do we need one of these you might say? Well you don’t, unless you want to know exactly where you found an item next week, next year or in 10 years time and return to a “hot spot”. A GPS reference for your find is as accurate as you can get. If you are going to record your interesting finds with your FLO
then they would prefer a six or eight figure grid reference, but they will accept just a parish reference. If you are of the old school, as I am, you will be aware that you can fix your position in a field quite accurately with only a Ordnance Survey map, a piece of card and a pencil. This will pinpoint your find down to an area 100 metres square. An “ABC” of how to take a simple map reference is given at the back of the book. I personally do not yet use a GPS system and, to my knowledge, there is only one person in our club of 50 members who does; so they are not yet standard equipment for detectorists. What will this little piece of kit cost you? Well, you can get a small basic device that you can carry in your pocket for about £60-£80. (In reality, this could be only the cost of a good night out for two with a curry to finish!) But perhaps, unless you like gadgets, you might not need one of these GPS machines; you can do the same thing with your map, a pencil, and a piece of card. (You will find easy-to-use instructions later in this book). There is a second “high tech” option, and that is using one of the Web Maps provided by organisations like Google in conjunction with Ordnance Survey, where you can find where you were detecting, and just read off the grid reference (http://wtp2.appspot. com/wheresthepath.htm) You will have two screens: on the left an Ordnance Survey map, on the right a Google satellite image. Just drag the map to where you want it, and zoom in! You will then have two sets of five numbers. Write down the first three numbers of each from the left, add the two letters that are there, and you have a six figure map reference (i.e. ST 742489). There is a second web site in the appendences at the back, so there are three ways to record a grid reference.
Final List
So we seem to have all the items necessary to go detecting, or do we? Perhaps we need just a little more?
- Tent
- Extra wet weather clothing
- Spare digger
- Spare detector
- Pack horse to carry it all
- A 4x4 all-terrain vehicle
- A large trailer
Always carry extra wet weather gear just in case you get wet; also a tent is useful if you get a bit tired. What about a spare digger in case your one breaks, and another detector for emergencies? With all this gear a pack horse might come in useful with a trailer in case he gets tired. And last a 4x4 all-terrain vehicle to pull the trailer. Well, perhaps not! Do you need all of the (sensible) kit? The answer is no, as all you need is a detector and something to dig with, but the rest of the bits will make your day more enjoyable and you will have the satisfaction of knowing you can go out detecting, and are ready as can be, for whatever occurs.