How to Metal Detect
Pages 60–68
So you have your detector, digger, and sandwiches. You have permission from the farmer to be where you are; which is just inside the first field of your first farm. Now what? Well, it’s time to find out if our great hobby is for you and to do that you need a few hints before you set off. The one thing you will need is a basic understanding of how to detect! All anybody needs is a bit of common sense. Beginners might think that every long time detectorist they talk to is an expert - and might claim to be so. But that is not true in my case. After all my time in the hobby I have to admit that I am still learning! Sometimes I am amazed at what I see detectorists doing in the name of metal detecting. This is always more obvious when you go to rallies and see people swinging their detectors all over the place, digging massive holes, and then not filling them properly. What is also appalling is the amount of rubbish that is dug up and then left on top of the ground. I once saw somebody leave 3 feet of rusty chain on the grass; can you imagine what that would have done to

the farmer’s equipment as he cut and bailed the grass? People also carry spades big enough for a navvy - it does make you wonder! It is also important that if you are detecting with others, give yourself a bit of space. Machines will interfere with each other and you really don’t want to go crashing into other detectorists! What we are trying to do here, is to help you get some of the knowledge that you will need to enjoy our hobby. So how do you start? The one thing you have to realise is there will always be targets out of range of whatever detector you have….it’s a fact of life. This means you have to concentrate on the ones that are in the range of your detector. To do this you have to detect in the right way and at the right speed, teach yourself to listen and identify the sounds in your headphones, and learn what your display (if you have one) is telling you. Each make of detector reacts and sounds slightly different from another, and if you change your detector or your headphones, expect this.
Testing Your New Detector At Home
The parcel has at last arrived, and that first sight of your new detector lying in the box is very exciting. This is what you have been waiting for! So let’s do things right - first read the instructions on how to fit it together! I say this as somebody who never reads instructions for anything. That normally means that I have to start again as things always seem to have a piece missing, they are of the wrong shape, or there are a lot of screws left over. I tell the wife, “It’s a manufacturing fault.” “It’s funny you always seem to get the bad one,” she says! If you do run into problems, your supplier is only a phone call away, and they can talk you through it.
Hint: when fixing on the coil and its lead, don’t wrap the lead too tightly around the stem, as you don’t want it pulling on the connections; and try not to over-tighten the screw or thumb nuts!
By now you are okay with the instructions. You put a set of batteries in and switch it on. Doesn’t it make a nice sound? If you have no sound at all, check the batteries are in the correct way! A good pair of headphones are worth their weight in Iron Age
gold staters. I believe you should always wear headphones as they will give you a better and clearer signal than the detector’s in-built speaker. They cut down on background noise, and some specialistdesigned detector headphones even amplify and boost the target signal. Do you have long arms? If so, for a comfortable swing you are going to need the stem shorter than somebody with short arms. Your arm should be at an angle that doesn’t pull on your shoulder, but you should still be able to rest the search head nearly on the ground. It might take a bit of getting used to, and a few weary arms, before you get it right.
Ground Balance
Some types of soil will give you false signals as a result of mineralisation. Machines can often counter this, and the “switch and go” machines will do this very easily indeed. They can then ignore any mineralisation in the soil and concentrate on the finding coins and artefacts. The manual for your machine will help you with this (so read it!), but if you intend to buy the detector from a shop then make sure you get a short lesson before you leave!
Discrimination
By far the most common metal object in the soil is an iron nail. Most detectors have an “all metal” setting and if you use this on your field, then you will dig up lots and lots of iron. This is fun for a bit but after a while you might like to introduce some discrimination. As each type of metal gives a different response, the machine will be able to ignore iron if you tell it to and most detectorists will do this. Different machines have different modes of discrimination, but the golden rule is to use as little as you can get away with. To be sure you might still dig up some iron but you will miss fewer non-ferrous items and, as a bonus, you get a little more depth from your machine. You will find that ringed iron objects, or those with a large hole in, tend to trick the discrimination and you will dig them anyway. So start low on 2-3; if you are digging unwanted small iron turn it up a little more until a signal from a large rusty nail starts to break up.
Threshold Sound
This is the small hum that you can hear in the background. This, if you have the facility on your detector, should be set so you can
only just hear it as a target signal will sound over it. Some detectors go silent briefly as you pass over an iron target (like a small nail). This is normal and is called blanking out.
Swing
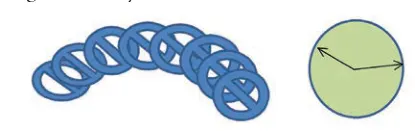
This is the easiest bit and the hardest to do correctly. The first rule is to keep the detecting head flat to the ground. The worst mistake people make is lifting the head at the end of the swing - so remember this isn’t golf! You don’t want to be hitting the ground hard, but the odd scuff is far better than missing the soil by several inches. The head is protected by a cover, that’s what it’s there for! The head should travel in a slight curve round to the right and left, and this can help to stop the head lifting at the each end of the swing. As I am right handed, my swing starts on the left side of the clock about “10 minutes to”, and ends on my right about quarter past. Then, as I take a step forward, the head swings back. If you raise the head at the end of each swing you will not be getting the same depth as in the middle. So, for example, if your detector detects 4 inches down, as you raise your detector head, this will fall to perhaps 2 inches; so for a 3 feet swing the middle gets maximum depth and, at the end, a lot less. This might equate to a loss of a quarter of the ground depth you should be covering with every swing that you make! The plus side of this is if there is an artefact hovering one inch above the ground you will find it, but it’s a pity about the gold stater in the ground a little further down! Your detector head should be kept moving. It’s better to be slightly slow than fast on the swing, as this gives the machine time to react to a find and tell you, by sound and a visual display, what it is. The swing of your arm should be in time with the opposite leg, so your walking pace also, to a certain extent, determines your swing. Walk slowly, swing with each pace steadily, and keep the sweep speed constant.

Sounds
Each and every detector will make different sounds for different objects. Sounds will alter for different types of metal, different depths, and even different sized objects. This is one of the things that you must get used to and the best way to start is to lay out different items on your lawn, and pass the head over each one in turn to listen to the sounds they produce.
“To Dig Or Not To Dig?”
If you dig every squeak or half-hearted beep from your machine, you will need a handcart to take your rubbish home, but if you only dig the really strong signals you might miss many good finds. A nice hammered coin just under the head will give you a different sound to the same one buried, at a slant, 4 inches down. Only time spent with your detector, and learning the different types of signal it produces will give you the knowledge and experience to second guess the ‘iffy’ signals. So when you start, “if in doubt, dig it” and learn what different things sound like; and, if it’s rubbish, take it home. At least then you are not missing anything and you’re learning about your machine! As you get more experienced you will get less junk and what you do dig will be a better class of rubbish!
Pinpointing & Digging
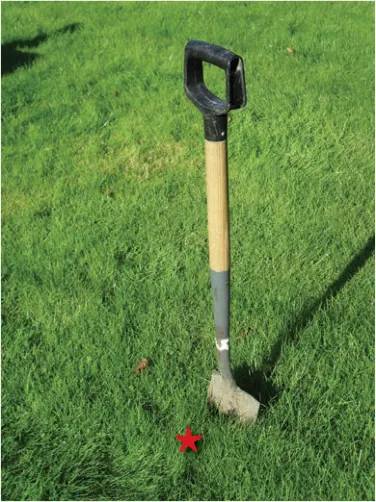
You have a positive signal, but what do you do next? Do you get out the pick and shovel? No. First, check the signal by moving slightly around it and, if it doesn’t disappear, switch to pinpoint mode (all metal). Now, as all detectors are slightly different, you might have to push a button, flick a switch up or down, or pull a switch towards you. (Chapter 3 will give you an insight into a few machines.) The pinpoint mode will help you determine precisely where your find is; normally the pitch will rise as the item gets to the centre of the search head. This will give you a straight line on the ground, about 6-8 inches long. Now move round at right angles to this and sweep again; the target is to be found where these two lines cross. So after pinpointing the target, and you are sure you know where it is, all you have to do is dig it up! This sounds simple, but you have to do this correctly as you want to be able to dig the hole, take out the object, refill the hole, and not leave a mess. The target should be right in the middle of that imaginary
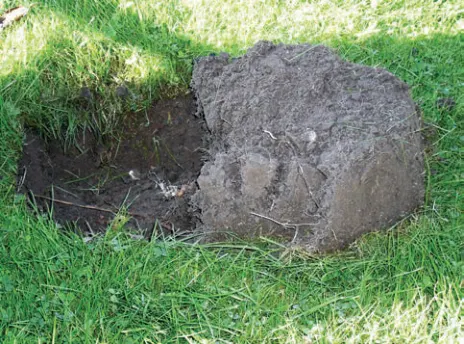
cross. Start at least 4 inches away and slightly behind it, sliding your spade in straight down at least 4 inches to cut through the grass and the roots. Then pull back on the handle slightly (this will release the grass on that side). Now, depending on the size of your digger, cut again at a slight angle. Turn slightly and then do the same again, and then one parallel to your fi rst cut; each time levering it slightly. So you now have four or fi ve cuts, with one end still intact. This uncut end will act as a hinge on the grass, and is important as it will allow the grass to carry on growing afterwards without any damage. With my small lady’s spade I can make a cut like this and, with my fourth cut, I can lever back the grass fl ap. If you want a slightly bigger hole, use fi ve cuts, but still leave the end intact. Then, by gently levering up this side, the whole piece will fl ap back, leaving the hole open with the 4 inch thick turf square on its back. What you have now is a nearly square hole approximately 4 inches deep, and a piece of turf grass side down. The fi rst thing to do is run your detector over the fl ap of grass to check if the target is in there; if it’s not then check the open hole. Quite often it is lying just there, but sometimes you are going to have to dig a little more. If the object was in the grass fl ap then this is where a probe comes in handy, as you can pinpoint it and carefully work out its location without damaging the turf square. The less harm you do to this square of grass, the less damage you are going to leave showing and the happier the landowner will be. If your target is not in the grass fl ap it will be in the hole! First, check with your probe to see if your fi nd is close to one of the edges. If it is, then you can carefully work it out with the tip of your knife. If it’s deeper, then it is time to be really careful! Dig straight down again with the back of the spade against one side and
carefully lever out the soil. If it’s really hard compacted soil, it would be better if you release each side again before levering it out. Place this spadeful carefully in a pile next to the hole, checking each time for the find. Some detectorists carry a square of plastic to put the dirt on; I always use this method on other people’s lawns. So now you’ve found it! Perhaps it is an old coin, button, brooch, buckle, ring pull, or even a gold coin! A nice coin or artefact goes into your finds bag, either in its own plastic bag or a box. All the normal common, but interesting, bits that are not rubbish go into a safe bag or compartment. Rubbish (if you’re sure it is) goes into your separate pouch or bag to be disposed of later (after a final check!). Before filling in the hole, check that there is not a second signal there. If it’s a piece of trash take it home to dispose of it. There is no point in leaving it in the hole; you are only going to find it next year. Some items of rubbish can be recycled, so do your bit for the environment! Now carefully put all the loose dirt and stones back into the hole, and flap back the turf. Then gently firm it down with your foot, until it’s the same as the grass around it. Finally, with your gloved hand, sweep away any loose dirt. Your hole should then be practically invisible, and the grass will quickly recover and continue growing. If you are detecting on a stubble field it’s not so important how tidy you are at filling your hole in, but the same care should always be used to dig the hole. Always refill it! Never leave a hole open, as it could be a danger to animals or people walking or riding across the land. And always remove any rubbish you dig!

Large and heavy chunks of iron etc. should be disposed of safely by taking them home.
Recording Finds
We will mention more about recording fi nds later, and the reasons why we need to do so. Always make a note of where you found a particular item. Once at home, as you empty your rubbish bag, double check. If necessary, wash an item to ensure it is rubbish before you dispose of it. Anything you are not sure of, save and ask for help with identifi cation at your club meeting - if you belong to one - or the help of more experienced detectorists. A lot of the bits of metal can be recycled (why put it in landfi ll?). In the Trowbridge Club we collect all the lead, sell it, and give the money to a charity.
Farm Watch
Farm Watch (similar to Neighbourhood Watch) is an organisation that helps to stop crime in the countryside. You can also help by having the number of your farmer and the Farm Watch scheme on your mobile. Then, if you see anything suspicious, or out of the ordinary, you can give your farmer a ring. It could be your car next time. One of our members had a bag stolen from the hedgerow where he had hid it. He found it later burnt to a crisp, with his spare detector head still in it. Another member used his phone when he found a herd of cows had got into the maize fi eld; one of our farmers really appreciated that call!
Gold Aureus
One of the best stories I have ever heard was where one detectorist had been going back occasionally to the same, well-worked site for over 30 years, convinced that there were more Roman bits to be found. Then, one day, he found a magnifi cent gold coin. For me this is as good as it gets, and it is a Roman aureus of Domitian, who was murdered in AD 96. This just proves what we always say: there is no such thing as a worked out site, just well worked, which is quite different! Every year, when the top soil is turned by the plough, the earth moves left, right or forward. Objects are never in the same position twice. Thirty years is a long time for a hobby, but not for one as interesting as this. You just never know what you are going to fi nd.

A Final Thought
Should you go slowly and overlap each swing to ensure you miss nothing? Or should you walk at a reasonable pace, and not cover every inch of ground? By overlapping you might find everything that is in front of you, but it’s going to take you longer than your mate to cover the same amount of ground as him. Two detectorists, Fred and George, using the same size search head at the same speed of swing will cover different amounts of ground. Fred might only cover half the distance of George but he will get maximum depth over a smaller piece of land; whereas George will certainly cover a greater distance but at slightly less depth, and not as thoroughly. They are both wrong, and both right for different reasons. There used to be a saying “a miss is as good as a mile”. The reality is, if you are an inch out, then you could miss a target. To get that maximum depth you are going to have to overlap each of your swings, which means it’s going to take you twice as long to cover the same amount of ground! If you are going to do this methodically you should be detecting between two rows of string so you don’t miss anything. By stringing a section a 3 feet wide, and overlapping you will know that you have done that piece of ground thoroughly, and you have not missed a thing within range of your detector. So if George misses a target, he will not know that he has missed it, and Fred will never know what he might have got as he will never reach the other side of the field! It’s entirely up to you!
New For Old
When I was a boy a tanner was sixpence; a bob was a shilling; and half a crown was two bob and a tanner. So now 3 feet is about 1 metre, and 4 inches is about 10 centimetres.